


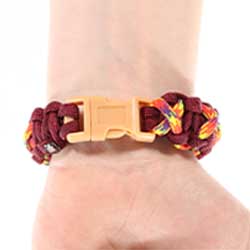
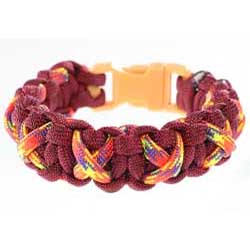
Crisscrossed Solomon Bracelet PDF
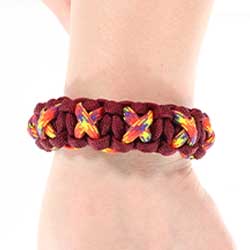
The Crisscrossed Solomon Bracelet is a simple bracelet that has added detail. It has elements of the cobra weave with the knots that are used but also has a crisscross design which gives it creative flare. It is a great bracelet for mid-level crafters and is great for people who want their bracelet to look a little more complex. Burgundy Paracord, Phoenix Paracord and a Tan 1/2" Buckle were used in the making of this tutorial.
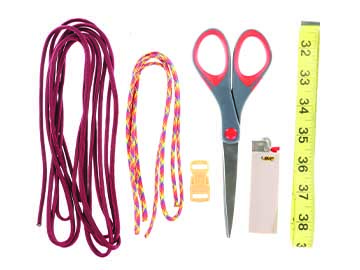
Supplies Needed:
- 8-10 ft. of color 1 paracord
- 3-5 ft. of color 2 paracord
- One 1/2” buckle
- Scissors
- Lighter
- Tape measure or ruler
1.
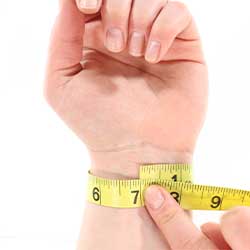
Before any weaving can begin, measure your wrist. Sewing tape works best for this, but you can also use a piece of paracord. With paracord, mark where it overlaps and then hold that length up to a ruler. If you are making this bracelet for someone besides yourself, the most common adult wrist size is between 6 and 9 inches.

2.
Choose any two colors of paracord you’d like and cut a piece measuring 8-10 ft of color 1. This color will be the main color. In general, you will want 1 ft of paracord for every inch your wrist measures and a little extra to ensure you don’t run out. Cut a piece 3-5 ft in length which will be the “x” in your bracelet.
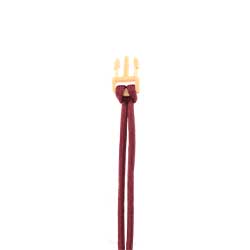
3.
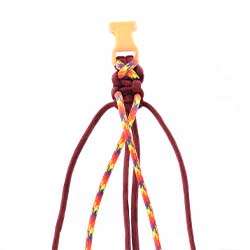
Fold the length of cord in half to find the center and create a cow hitch knot on the male end of the buckle.
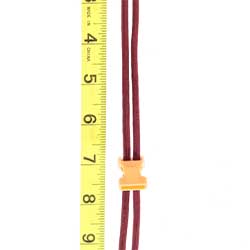
4.
While making sure to not twist the cords, run the free ends of the cord through the female end of the buckle. Make sure that the length of your bracelet correctly corresponds with your wrist measurement. If your wrist measure 7 in., your bracelet length should be the same.
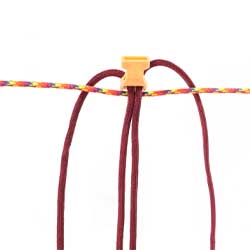
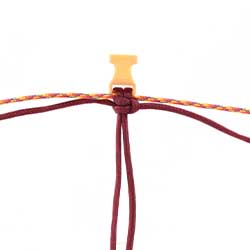
5.
Take color 2 and place the center of it underneath the middle two cords on the female end of the bracelet.
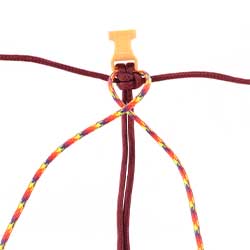
6.
While keeping color 2 out of the way, bring the right-side cord of color 1 over the center cords.
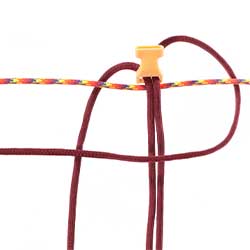
7.
Place the left cord over the right cord, bring it underneath the middle two cords, and then over the right cord.
8.
Pull the knot tight.
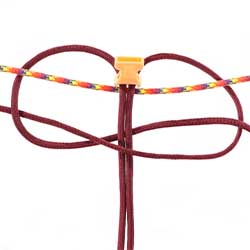
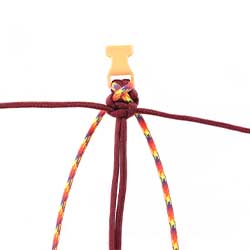
9.
Do the opposite of Step 5 by starting with placing the left cord over the middle two cords and then finishing the knot and pulling tight.
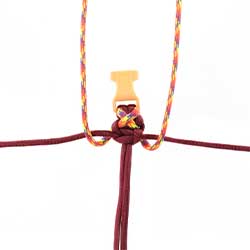
10.
Take color 2 and bring both cords over the two knots and cross them with the right cord over the left.
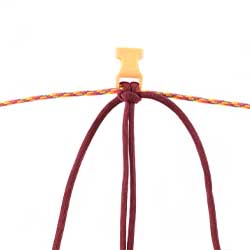
11.
Begin to make the same two knots as before in Steps 4 through 7 while keeping color 2 out of the way and underneath color 1.
12.
Place the two cords of color 2 above the bracelet out of the way of the weave.
13.
Create two more knots the same as steps 4 through 7 and then take color 2 and cross them with the left cord over the right.
14.
Continue this pattern until you reach the end of the bracelet.
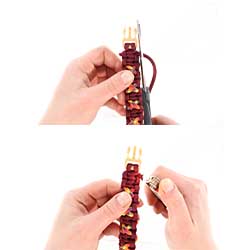
15.
Cut the cords of color 2 and color 1, melt the ends, and flatten.
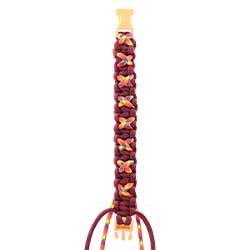
Your Crisscrossed Solomon Paracord Bracelet should look like this:
Any color of 550 paracord as well as a 1/2” buckle will work for this bracelet. To check out other tutorials for more step-by-step guidance, click here.